· 4 min read
junminhong(jasper)

前言

最近專案在使用Capistrano部署的時候, 發現機器上的node version比專案需求的還要低, 導致一直沒有辦法正常部署

升級的同時順便紀錄一下步驟, 以便免未來的我又忘記了😅

實作升級

ubuntu 升級node version, 其實方法還蠻多的, 可以透過nvm或者PPA

nvm

蠻方便的一個node version manager tool, 但是在使用Capistrano部署的時候似乎沒有辦法正常吃到nvm的default node.js, 所以只好改用PPA來安裝以及更新node

安裝

# 更新套件列表及版本資訊
sudo apt-get update

# 透過curl去抓install script
curl -o- https://raw.githubusercontent.com/nvm-sh/nvm/v0.39.5/install.sh | bash

# 設定一下nvm環境變數
export NVM_DIR="$([ -z "${XDG_CONFIG_HOME-}" ] && printf %s "${HOME}/.nvm" || printf %s "${XDG_CONFIG_HOME}/nvm")"
[ -s "$NVM_DIR/nvm.sh" ] && \. "$NVM_DIR/nvm.sh" # This loads nvm

# reload
source ~/.bashrc
source ~/.zshrc

基本指令

# 查看目前可以被安裝的node version
nvm ls-remote

# install node.js
nvm install node

# list installed node version
nvm ls

# choose nvm version
nvm use node

# 設定node版本為default
nvm alias default node

PPA(Personal Package Archive)

什麼是PPA

PPA是一個私有的軟體包存儲庫, 允許開發者將他們開發或打包的軟體上傳到Launchpad(一個由Canonical Ltd. 提供的開發平台), 從而讓所有Ubuntu用戶可以方便地安裝和更新

通常, 一個PPA包含一個或多個軟體包, 這些包可能是正式Ubuntu軟體庫中沒有的或者是更新版本的軟體

nodesource

那我們要在ubuntu上面安裝node.js, 需要透過nodesource

安裝

# 更新套件列表及版本資訊
sudo apt-get update

# 安裝curl gnupg ca-certificates 套件
sudo apt-get install -y ca-certificates curl gnupg

# 製作apt key要放的資料夾
sudo mkdir -p /etc/apt/keyrings

# 製作gpg key並放到剛建立好的資料夾內
curl -fsSL https://deb.nodesource.com/gpgkey/nodesource-repo.gpg.key | sudo gpg --dearmor -o /etc/apt/keyrings/nodesource.gpg

# 安裝對應node version source list
# 假設今天想要安裝16, 那這邊就要設定16
NODE_MAJOR=20
# 接著將source放進去nodesource.list檔案裡面
echo "deb [signed-by=/etc/apt/keyrings/nodesource.gpg] https://deb.nodesource.com/node_$NODE_MAJOR.x nodistro main" | sudo tee /etc/apt/sources.list.d/nodesource.list

# 再跑一次更新套件列表以及版本, 這邊會根據剛剛設定好的source去把對應的node.js version拉下來
sudo apt-get update

# 透過policy可以確認剛剛的設定是否成功, 可以看到相關訊息
apt policy nodejs

# 安裝node.js, 會自動幫你抓當前版本最新, 也就是說你剛剛設定16的話, 就會去幫你抓node.js 16最新的版本
sudo apt-get install nodejs -y

解除安裝

apt-get purge nodejs &&\
rm -r /etc/apt/sources.list.d/nodesource.list &&\
rm -r /etc/apt/keyrings/nodesource.gpg

舊版做法

# 更新yarn key
curl -sS https://dl.yarnpkg.com/debian/pubkey.gpg | sudo apt-key add -
# 設定PPA為16版, 這個是舊版做法
curl -fsSL https://deb.nodesource.com/setup_16.x | sudo -E bash -

結論

‼️注意 nodesource新版有在指令上有做調整

原本使用舊的作法一直遇到找不到相關node.js版本的問題, 花了一點時間在排查, 後面才發現指令上有做些調整😆
· 3 min read
junminhong(jasper)

前言

最近一直收到Elasticsearch監控發出錯誤的訊息, 所以就來排查一下發生的什麼事, 同時順便優化了一下監控 🚧

實作

使用萬用的shell script

# elasticsearch_health_check.sh
#!/bin/bash

# Elasticsearch cluster URL
ES_URL="https://localhost:9200"

# call cluster health api, 非常推薦用這串參數
RESPONSE=$(curl -s -o response.txt -w "%{http_code}" --user username:password "${ES_URL}/_cluster/health?level=shards&wait_for_status=green&timeout=60s")

# Extract the cluster status, 這邊是用jq解析, 看個人喜好
STATUS=$(cat response.txt | jq -r .status)

# Logic to handle the status
if [ "$STATUS" == "green" ]; then
# 節點綠燈時輸出的訊息
elif [ "$STATUS" == "yellow" ]; then
# 節點黃燈時輸出的訊息
else
# 節點出現嚴重錯誤時輸出的訊息
fi

if [ -n "$message" ]; then
# 可以串接至個人使用的通訊軟體
fi

cluster health api參數解釋

# api endpoint
_cluster/health

# 為什麼會設定level是shards呢?
# 監控顧名思義就是要在出現問題時, 要有相關紀錄可以排查問題, 所以一定是希望資訊越多越好
# 所以蠻推薦調整一下level
level=shards

# 等待節點狀態變成綠色
wait_for_status=green

# 預設30s, 建議可以調整一下
timeout=60s

搭配crontab

# 查看目前系統有哪些crontab
crontab -l

# 設定crontab
crontab -e

# 每十分鐘執行一次剛剛寫的shell script, 已達到定期檢查elasticsearch健康度的需求
*/10 * * * * elasticsearch_health_check.sh

結論

基本shell script可以再根據個人的需求調整相對應的邏輯, 就可以做出一個蠻好用的elasticsearch的監控了

善用crontab ~~ 👍🏻

參考資料

· 3 min read
junminhong(jasper)

前言

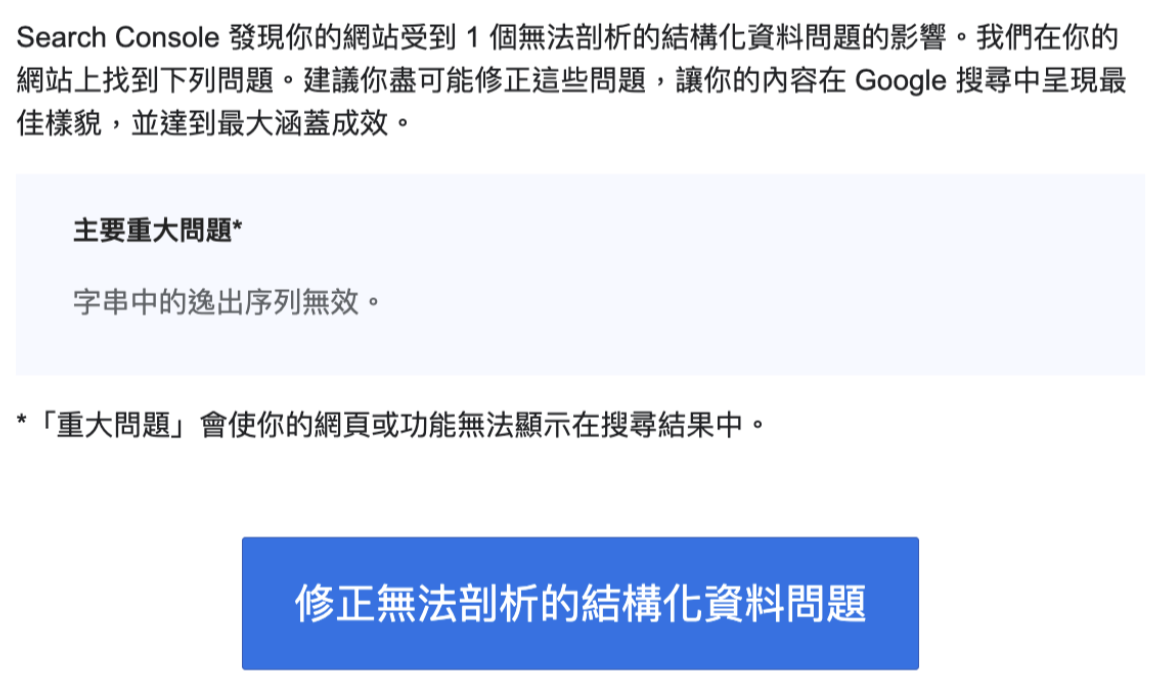
最近google search console警告網頁出現了

google search console的警告訊息

排查前熱身

google 本身有提供兩個線上工具可以善用

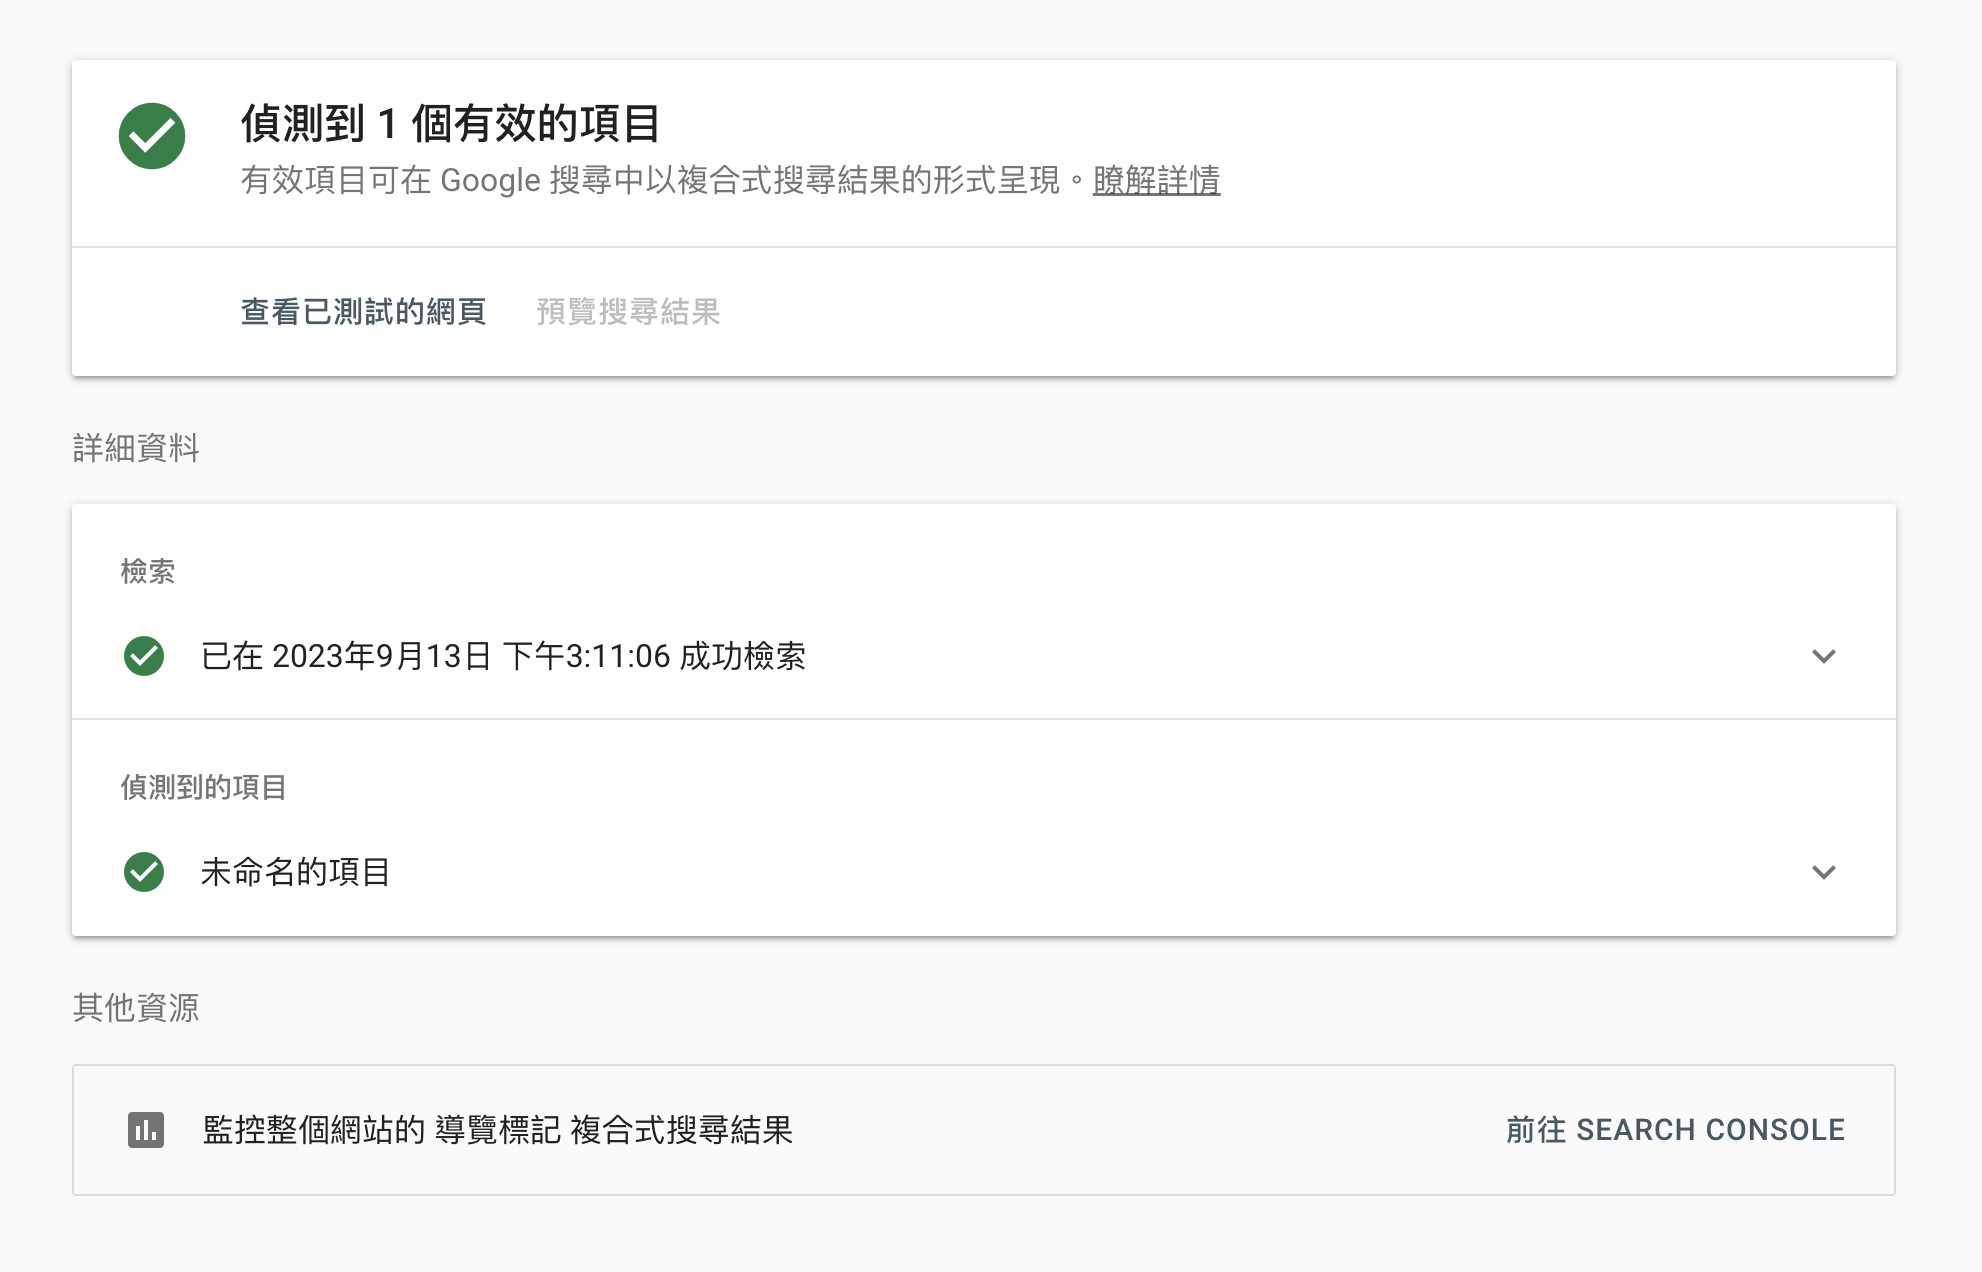
複合式搜尋結果測試

  • 將你想要測試的網址貼上, 並等待個幾分鐘的處理時間 複合式搜尋結果測試網站圖
  • 接著你就會看到測試的結果, 然後你就可以根據網站給你的提示進行修正即可 複合式搜尋結果測試結果

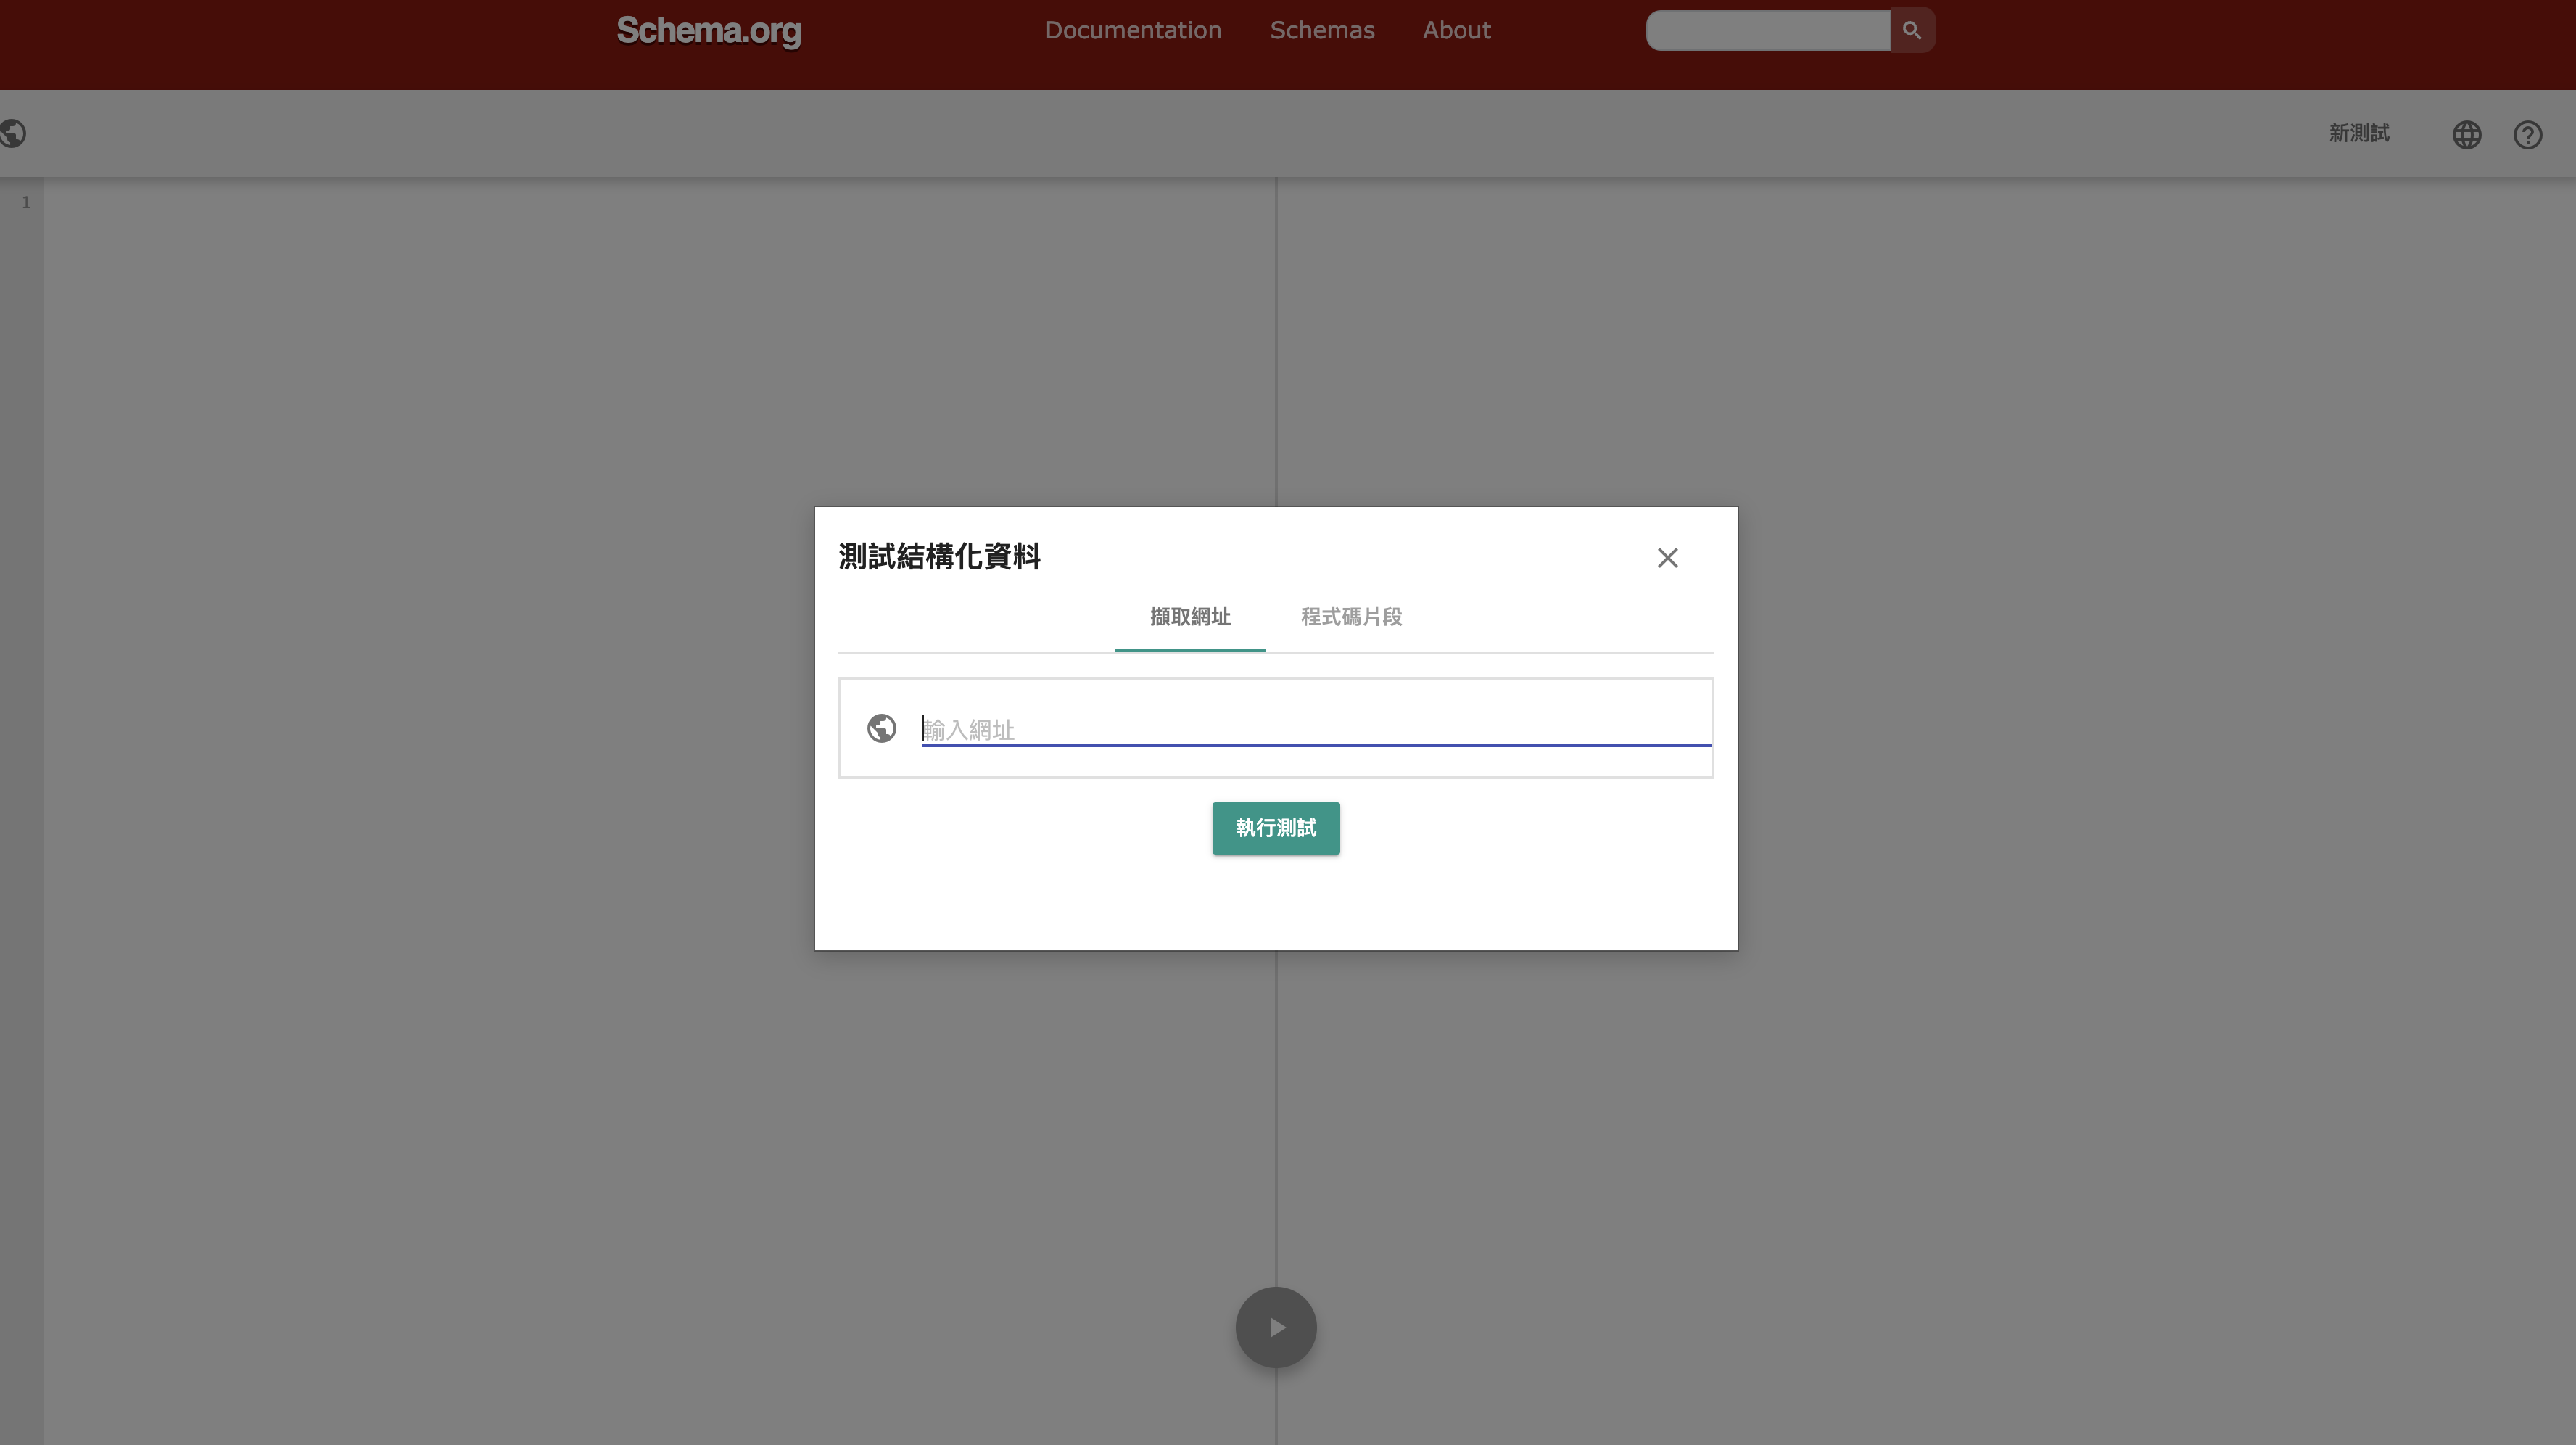
結構定義標記驗證工具

  • 將你想要測試的網址貼上, 並等待個幾分鐘的處理時間 結構定義標記驗證工具網站圖
  • 一樣根據網站提供的資訊進行修正即可

排查過程

那在經過工具的測試後發現原因出在JSON-LD身上

<script type="application/ld+json">
{ /* your structured data */}
</script>

什麼是JSON-LD (JavaScript Object Notation for Linked Data)

簡單來說就是在描述這個網頁的型態以及內容, 而google的搜尋引擎會去讀取網頁中的結構化資料, 並針對不同的網頁型態做對應的搜尋結果呈現

<html>
<head>
<title>Software Engineer</title>
<script type="application/ld+json">
{
"@context" : "https://schema.org/",
"@type" : "JobPosting",
"title" : "Software Engineer",
"description" : "<p>Google aspires to be an organization that reflects the globally diverse audience that our products and technology serve. We believe that in addition to hiring the best talent, a diversity of perspectives, ideas and cultures leads to the creation of better products and services.</p>",
"identifier": {
"@type": "PropertyValue",
"name": "Google",
"value": "1234567"
},
"datePosted" : "2017-01-18",
"validThrough" : "2017-03-18T00:00",
"employmentType" : "CONTRACTOR",
"hiringOrganization" : {
"@type" : "Organization",
"name" : "Google",
"sameAs" : "https://www.google.com",
"logo" : "https://www.example.com/images/logo.png"
},
"jobLocation": {
"@type": "Place",
"address": {
"@type": "PostalAddress",
"streetAddress": "1600 Amphitheatre Pkwy",
"addressLocality": "Mountain View",
"addressRegion": "CA",
"postalCode": "94043",
"addressCountry": "US"
}
},
"baseSalary": {
"@type": "MonetaryAmount",
"currency": "USD",
"value": {
"@type": "QuantitativeValue",
"value": 40.00,
"unitText": "HOUR"
}
}
}
</script>
</head>
<body>
</body>
</html>

參考資源

· 4 min read
junminhong(jasper)

前言

最近在進行rails專案bundle install的時候, 發現有一個gem始終裝不起來。

這邊記錄一下排查思路以及解決方式

進入排查程序

當在做bundle install的時候遇到了這個錯誤訊息 mini-racer-bundle-error

於是乎呢!我就直接使用google大法把這段錯誤訊息貼上查詢, 不外乎就會得到一些解答

這邊列舉幾個issue有在討論這件事情

從幾個討論串中得知了幾種做法

第一種做法

主要是透過自行安裝v8並在bundle的時候指定使用剛剛安裝好的v8

# 透過homebrew安裝v8
brew install v8
# 然後指定bundle config
bundle config build.libv8 --with-system-v8

bundle install

第二種做法

# 新增一個bundle lock 為ruby環境
bundle lock --add-platform ruby

以上做法都無法解決我的問題, 但由於呢始終沒有頭緒, 所以我只好重新安裝ruby

這邊我來介紹一下怎麼透過rbenv管理ruby

安裝好用的ruby管理器rbenv

# 透過brew安裝
brew install rbenv
# 安裝指定ruby版本
rbenv install 2.7.4
# 記得安裝一個新的ruby版本一定要執行這個指令
rbenv rehash

這樣就完成的ruby的安裝

繼續排查之路

當我重新安裝好ruby並重新bundle install的時候又發現還是出現一樣的問題

實在是走投無路的我只好乖乖的把bundle error log拿出來看看, 找看看有沒有什麼蛛絲馬跡

結果!似乎讓我找到了點東西

# 這邊有發現幾行的錯誤訊息, 看起來似乎跟macos自身帶的commandLineTools有關
No receipt for 'com.apple.pkg.CLTools_Executables' found at '/'.

No receipt for 'com.apple.pkg.DeveloperToolsCLILeo' found at '/'.

No receipt for 'com.apple.pkg.DeveloperToolsCLI' found at '/'.

Node.js configure: Found Python 3.9.13...
WARNING: --openssl-no-asm will result in binaries that do not take advantage
of modern CPU cryptographic instructions and will therefore be slower.
Please refer to BUILDING.md
WARNING: warnings were emitted in the configure phase

當我看到了這個錯誤訊息後, 我就去試著找了一下macos本身的commandLineTools相關的資訊

接著我就試著重裝一下xcode commandLineTools, 果真就可以正常安裝了

macos xcode commandLineTools 怎麼重新安裝

xcode-select -print-path
# 你會找到你的xcode commandLineTools裝在哪裡
# /Library/Developer/CommandLineTools

# 移除xcode commandLineTools
sudo rm -r /Library/Developer/CommandLineTools

# 重新安裝xcode commandLineTools
xcode-select --install

# Switch Xcode's path
sudo xcode-select -switch /Library/Developer/CommandLineTools

# Reset Xcode's path
sudo xcode-select --reset

· 3 min read
junminhong(jasper)

為什麼要安裝GPG

可以讓人家知道commit 是你本人所提交的

安裝gnupg

brew install gnupg

產生GPG keys

gpg --full-generate-key
# 這邊可以選擇你要使用哪一個金鑰種類
Please select what kind of key you want:
(1) RSA and RSA
(2) DSA and Elgamal
(3) DSA (sign only)
(4) RSA (sign only)
(9) ECC (sign and encrypt) *default*
(10) ECC (sign only)
(14) Existing key from card

# 我這邊使用1 RSA and RSA

# 這邊可以輸入金鑰的長度
RSA keys may be between 1024 and 4096 bits long.
# 我這邊使用4096, 最高最強悍

# 這邊可以選擇你的金鑰要多久後過期
Please specify how long the key should be valid.
0 = key does not expire
<n> = key expires in n days
<n>w = key expires in n weeks
<n>m = key expires in n months
<n>y = key expires in n years
# 這邊為了省事, 我是直接選擇不過期

# 接著會要你填一些username and email之類的訊息, 就照實填寫
# 產生完成之後你會看到pub uid sub

提交剛剛產生好的公鑰到Github

# 可以使用這個指令顯示出所有包含公鑰與私鑰的GPG keys
gpg --list-secret-keys

# Fingerprint = sec 那一段複製起來
gpg --armor --export <Fingerprint>

# 你會拿到這段然後把這段貼到Github上
-----BEGIN PGP PUBLIC KEY BLOCK-----
key
-----END PGP PUBLIC KEY BLOCK-----

Github

  1. 進到Setting → SSH and GPG keys → 把剛剛那段GPG keys塞進來

接著來設定git

# 僅限此倉庫
git config user.signingkey Fingerprint

# 全域設定
git config --global user.signingkey Fingerprint

# 如果不想要每次commit都加-s可以用以下設定
# 僅限此倉庫
git config commit.gpgsign true

# 全域設定
git config --global commit.gpgsign true

故障排除

error: gpg failed to sign the data
fatal: failed to write commit object

# 執行這段檢查一下
echo "test" | gpg --clearsign

gpg: signing failed: Inappropriate ioctl for device
gpg: [stdin]: clear-sign failed: Inappropriate ioctl for device

# 解決方式, 加到.zshrc之類的環境變數裡面, 然後重讀一次設定檔即可
export GPG_TTY=$(tty)

· 5 min read
junminhong(jasper)

What is SAML

SAML是 Security Assertion Markup Language(安全斷言標記語言)的縮寫,它是一個用於在網絡上進行身份驗證和授權的 XML 標準。

SAML是一種用於單點登錄(Single Sign-On, SSO)和身份提供者(Identity Provider, IdP)之間通信的協議。

它的主要目的是允許不同的網絡安全域之間共享身份信息,以實現用戶在多個應用程序和服務之間無需重複登錄的功能。

SAML主要有一些關鍵概念和角色:

身份提供者(IdP): 身份提供者是負責驗證和管理用戶身份的服務。當用戶嘗試訪問一個需要驗證的應用程序時,他們首先被重定向到 IdP,以驗證其身份。

服務提供者(SP): 服務提供者是需要驗證用戶身份的應用程序或服務。SP 不直接處理身份驗證,而是依賴於 IdP 驗證用戶並提供對應用程序的訪問權限。

SAML斷言: SAML 斷言是包含用戶身份信息的 XML 文件,由 IdP 簽名,然後發送給 SP。斷言通常包括用戶身份信息、有效期限、用戶角色等信息。

SSO(單點登錄):SSO 是指用戶只需一次登錄,然後就能夠訪問多個 SP,而不需要在每個 SP 上都進行單獨的登錄。SAML 是實現 SSO 的一種常見方法。

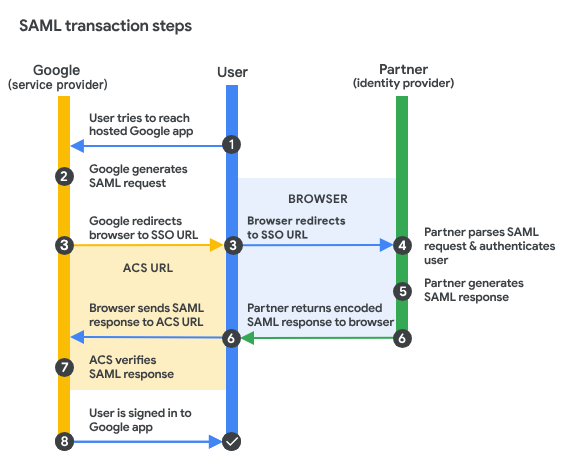
SAML 流程是什麼呢?

google saml 流程

從這張流程圖中來解釋

  1. user嘗試訪問一個需要身份驗證的 SP
  2. SP 接收到user的訪問請求後, 會將user重定向到 IdP,進行相關的身份驗證。
  3. user在 IdP 上驗證身份。
  4. IdP 創建一個包含user information的 SAML 斷言,並將其簽名。
  5. IdPSAML 斷言發送回 SP
  6. SP 驗證 SAML 斷言的簽名,然後根據斷言中的information決定是否允許user訪問應用程序。

SAML 是企業和組織中實現單點登錄和安全身份管理的重要工具,特別是當存在多個應用程序和服務時,並希望用戶無需多次輸入他們的登錄資訊。

它提供了一個標準化的方法,以確保安全地共享身份信息。

實作

筆者這邊以ROR專案為例, 並以可支援多個IdP進行實作

  1. 首先先安裝 ruby-saml gem
  2. 搭配 devise 管理user登入流程
# routes.rb

# 這邊搭配devise提供的user scope
devise_scope :user do
post '/users/sso/sign_in' => 'users/sso_sessions#new'
post 'users/sso/auth/:idp_id' => 'users/sso_sessions#auth', as: 'users_sso_auth'
end
# models/account.rb
# frozen_string_literal: true

class Account < ApplicationRecord
class << self
def get_saml_settings(idp_provider)
OneLogin::RubySaml::Logging.logger = Logger.new(Rails.root.join('log/ruby-saml.log'))
settings = OneLogin::RubySaml::Settings.new

# When disabled, saml validation errors will raise an exception.
settings.soft = true

# 設置你server提供的callback url
settings.assertion_consumer_service_url = "http://localhost:3000/users/sso/auth/#{idp_provider.id}"
# 設置你server提供的sp url
settings.sp_entity_id = 'http://localhost:3000/sp'
# idp 實體ID
settings.idp_entity_id =
# idp sso登入網址
settings.idp_sso_service_url =
# idp 憑證
settings.idp_cert =
settings.name_identifier_format = 'urn:oasis:names:tc:SAML:1.1:nameid-format:emailAddress'
settings.idp_sso_service_binding = 'urn:oasis:names:tc:SAML:2.0:bindings:HTTP-POST'
settings.idp_sso_service_binding = 'urn:oasis:names:tc:SAML:2.0:bindings:HTTP-Redirect'
settings.idp_cert_fingerprint = OpenSSL::Digest::SHA1.new(Base64.decode64(idp_provider.certificate)).to_s
settings
rescue
nil
end
end
end
# sso_session_controller.rb

def new
# 你可以先透過某些key(ex: user_email etc...) 抓到idp, 再去拿設定檔
idp_provider = IdentityProvider.find()
settings = Account.saml_settings(idp_provider)
request = OneLogin::RubySaml::Authrequest.new
sso_login_url = request.create(settings)
# 跳轉至IdP登入網址, 動態取得setting就可支援多IdP
redirect_to(sso_login_url)
rescue
head(:bad_request)
end

# saml callback
def auth
# 我這邊還蠻建議帶個idp_id(這裡可以用uuid之類的), 在IdP驗證完的時候, 可以直接透過這個id直接拿到對應的provider
idp_provider = IdentityProvider.find_by(idp_id: params[:idp_id])
settings = Account.saml_settings(idp_provider)
response = OneLogin::RubySaml::Response.new(params[:SAMLResponse], settings: settings)
# response.is_valid? 沒有通過驗證可以考慮直接回傳401
unless response.is_valid?
# 如果response過驗證後, 就可以走devise的流程即可
user = User.find_by(email: response.name_id)
sign_in(:user, user)
yield user if block_given?
redirect_to(after_sign_in_path_for(user))
end

結語

其實使用saml來實作SSO(Single sign on)的流程並不複雜, 基於上述實作方式可根據不同情境做不同的實作細節。

· 2 min read
junminhong(jasper)

起由

原本的blog, 因為domain忘記續約, 加上換個domain的關係, 想說徹底來換一套新的blog framework.

剛好之前有關注到Facebook團隊有推出一套docusaurus

重頭戲

其實安裝docusaurus不難, 基本上照著官方教學走就可以建置出基本的網站了。

我個人比較喜歡用yarn, 所以安裝步驟都會以yarn為主

yarn create docusaurus

[建議] 搭配 Tailwind CSS

個人蠻愛用tailwind, 所以就乾脆整合再一起, 以利接下來的版面優化。

  • 安裝tailwind css package
yarn add tailwindcss postcss autoprefixer
  • 初始化tailwind, 創建tailwind.config.js
npx tailwindcss init
  • 你會獲得一個tailwind.config.js, 複製以下內容
module.exports = {
content: ["./src/**/*.{js,jsx,ts,tsx}"],
theme: {
extend: {},
},
plugins: [],
corePlugins: {
preflight: false,
}
}
  • 把tailwind css 放進去 custom.css
@tailwind base;
@tailwind components;
@tailwind utilities;

Deploy

這邊直接使用vertical

domain